Hi there. I wanted to share this card with you all today. Its a traditional Christmas card based loosely on a idea i saw on Pinterest but I have adapted it to suit my project.
Start with a 14.5x 14.5cm card then cut a piece of spotty paper 14x14cm distress the edges of the paper then ink the edges, wrap some lace around first before adhering to the card base, then with a piece of contrasting paper in the pack (dovecraft. Back to Basic Christmas vintage, which I have used through out the card) cut a piece measuring 7x13cm distress round the edges then ink the edges adhere to the card on the left hand side. Cut three circles two in patterned paper and one in kraft card, arrange them with the two smallest behind the large one adhere to the card. Ink the skate's, bow and firs adhere to the card and add a sentiment. Ho I nearly forgot the pearl on the bow to finish off. I hope its inspired you
Thank you for calling and visit again soon
Love Sharon xx:-)
Friday 27 November 2015
Wednesday 25 November 2015
Spinner card.
Hello there. Just stopped by to share this quick and simple spinner card with you all today. I love the colour purple so today's card is made from different tones of my fav colour. I think silver and white look nice with it too.
Start with a A5 white card. Use a circle die to cut out the front of the card. Create a frame to go round the circle with the same circle die and a larger scallop edge die. Adhere this to the card front
The bauble toppers are from kanban, pop 2 out from the sheet and sandwich them together with a length of nylon thread in between. Adhere to the back of the circle making sure it is suspended centrally. To hide the mess on the back cover with a piece of coordinating paper. Cut a bow ( I used a template and embossed it with a star folder and inked the edges ) Adhere to the card and top with a sparkly jewel
On the inside adhere a fancy die cut circle and finish off with die cut sentiment underneath the bauble. Hope you like it!!
Thank you for your company and Happy Crafting!!
Love Sharon xx:-)
Sunday 22 November 2015
Merry and Bright.
Hi there. I thought I'd share this clean and simple Christmas card with you all today. It's quite quick to achieve with not alot of material's all you need is an embossing folder, card, a few embellishments and of course glitter
Start with a 8x8in card blank. Matt and layer a piece of pale blue card and silver card on to the base. Take a piece of white pearlesent card, emboss through the bauble folder and cut it to fit the card. Emboss again with the folder, but cut only the outer and middle baubles out. Glitter the baubles. Mount on foam pads to give the baubles dimension and adhere over the matching embossed bauble on the card. Decorate all the baubles with a bow then a pearl and for extra impact decorate the middle one with a charm. To finish stamp a message in the bottom right hand corner. I like the clean look of this card and the added embellishments set it off. Hope I have inspired you a little.
Thanks for your company and please call in again. Love Sharon Xxx:-)
Tuesday 17 November 2015
Woodland fox.
Hi there. Thought I'd share this quick & simple card with you all today. It's a card I have put together with different bits & bobs I have found in my craft stash, which we all have hanging around just waiting to found the right card to put them on.
I started the project firstly with a 15x15cm base card. I embossed, inked and cut a piece of kraft card 14x14cm. Matt onto the base card and cut, ink and emboss a frame 12x12cm. Mount centrally onto the card with foam pads, with a fox stamp ink onto card. (I used one of the leaf backgrounds I had prepared previously from my autunm leaf cards. I thought it might be fun to stamp the fox onto it. ) position it onto the left hand side on foam pads. Glue leaves behind and a button on each leaf.
Stamp just for you on a strip of white card backed onto a strip of black card, tuck under the frame and over at the end, trim with bakers twine. To finish add a friend banner (craft asylum) and there you go the card finished.
Thanks for calling in and join me soon for another card to hopefully inspire you.
Love Sharon xx:-)

Saturday 14 November 2015
Autumn leaves.
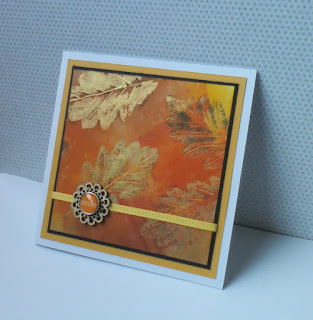
Hi there. I thought I'd share this collection of autumn inspired cards with you, as promised in my last post. These were achieved in the same way as my last card entry, apart from using the brayer to criss cross through the card. Also there are slight changes to the materials, due to experimenting a little with paint effects.
Its a fun technique to try out and especially at this time of year when the colours are so vibrant.

Thank you for your company and please pop in again.
Love Sharon xx:-)
Its a fun technique to try out and especially at this time of year when the colours are so vibrant.

Love Sharon xx:-)
Thursday 12 November 2015
Autumn leaves ( inking technique.)
Hi there. I'm glad to be back from a long crafty break and can't wait to showcase my card ideas again. This card is a simple inking technique from a craft magazine I saw and thought it was a good technique to try out.
This is how i made the background...
I cut a piece of square white card out first. I prefer to work on a larger piece of card when i am working on a background and cut it down to size afterwards to fit my card base. I applied various distress inks (mustard seed and rusty hinge) to the card, blending the colour's into one another. Then flicked water onto the top to give it a bleached look. (which doesn't seem to be as noticeable on this card) with a fresh leaf (vein side prominent) brayer a darker distress ink (peeled paint) over it. I Positioned the leaf ink side down onto my inked card and with a piece of copy paper burnish it to print the leaf, repeat several times to make a pattern. When dry I used my drayer full of ink (barn door) to give it a criss cross effect though it. Finally with metallic gold acrylic paint, over burnish on top of the leaf impression. Allow to dry again. Cut to 12x12cm, mat and layer on to a 14.5x14.5cm base card and decorate accordingly.
I have made lots of different samples using this technique. I would love to share these with you in my next blog entry.
Thanks for calling in and see you soon
Love Sharon xx:-)
Subscribe to:
Posts (Atom)


