Tuesday, 2 February 2016

Especially for you.

Hi everyone. I just had to share another post featuring the marianne butterfly. The card is quite simple but the butterfly gives it that focal point and looks very elegant on any special card.


I started this card with a pre scored A5 card blank. Matt a piece of silver mirri board onto the front then take the square insert die out of the jasmine dream embossing folder and die set ( tonic studio's ) and cut an aperture into a piece of white embossed card, raise it onto foam pads and attached it on to the card, leaving a border. Cut a white stripe of card 3.5cm wide and stamp 'especially for you' on the right hand side ( clearly besotted stamp ) then back it onto silver mirri and attach it to the card.
I double layred the butterfly ( one white and one gold mirri ) and added a string of pearls on the body of the butterfly. Finally I added a trail of sequins in silver and gold to match the butterflies wings.
I hope this gives you some inspiration to follow and please let me no if you would like any more information on this card...for example the measurements.
Thanks for calling in and Happy Crafting!!
Love Sharon xx


Wednesday, 27 January 2016

Elegant butterfly.

Hi everyone. Thought I'd share this quick card with you today. I have used the Botanica papercrafting kit from craftwork cards ( free gift from a craft magazine )
A stamped sentiment from clearly besotted, fancy butterfly die and pearls.
I started this card with a A5 card blank. Measure and cut 2 pieces of coordinating paper out of the kit, lay the plain paper at the top and the patterned at the bottom. Cut a 3in strip of deep pink paper out of the kit, apply across the middle, this disguises the join and divides the 2 paper's up. I cut another 3in stripe of yellow paper out of the kit and applied near the top as shown. I added the die cut white butterfly, which I double layered onto silver mirri then decorated the body with pearls. Finally i stamped a sentiment in black ink on the deep pink border.
Thanks for calling in and Happy Crafting!!
Sharon xx


Saturday, 16 January 2016

Easal card.

Hi there. This is my project for today. It's an easal card I have put together made from bits and bobs from my crafty stash.
On the front of the card i have used lots of coordinating matts and layers to built up diminish, stamped best wishes on a matching panel and embellish with butterflies and a flower.
The base as a flower stopper to stop the front of the card from slipping foreword.


Thank you for calling by and Happy Crafting!
Sharon x

Tuesday, 12 January 2016

Botanica.

Hi there. Happy new year and best wishes for 2016.
This is my first blog entry of this year so I thought I would kick off with this pastel floral and butterfly card, which I adore.
The papers and sentiment are from the Botanica range from craftwork cards. The kit I am useing was printed exclusively for a free 68-piece papercrafting kit in a craft magazine. It is so beautiful and the colours are so nice.
The die is from cherry Lynn and the embellishments are from my crafty stash.
Hope you like it!
Thanks for calling in and Happy Crafting!
Sharon x


Wednesday, 16 December 2015

Christmas Message.

Hi everyone. Just stopped by to share with all my fellow crafter's out there, this quick and simple last minute Christmas card make. It's also slim enough to fit through the post box, minus the button.
Start with a A5 pearlesent card blank. Cut a piece of Nordic inspired patterned card ( pick and mix payper box ) the same size as the front of the card, before adhering this to the card front, take a length of red ribbon and place it between the two.
Next Adhere a topper to the ribbon, allow it to swing about without attaching to the card. ( I used a glitterments, die-cut sparkling sentiment from docrafts )
Lastly Adhere a button to the top of the topper and cut a fish tail in the ribbon.
Thank you for your company and as always Happy Crafting!
Love SharonXXX:-)


Sunday, 13 December 2015

Christmas Poinsettia's

Hi everyone. Only 12 days before Christmas, its flying by. I don't know were the time goes, any way just enough time to post a few more Christmas cards on my blog before l deliver them.
This card came about when I was looking through my card stash and came across lots of stamped poinsettia's l had stamped on to a sheet of card from a borrowed stamp. I decided to make use of it and that was what inspired me to make this card.
Start the card by sprizting a A5 card with a gold mattalic mister, leave to dry, when dry take a oblong die, Cut an aperture into the card front.
Next take a pre cut lattice sheet or if you have a lattice die, cut one from it. Stamp with a script stamp in gold all over the lattice, cut to fit behind the aperture, back gold mirri behind it and adhere to the back of the aperture.
Cut a strip of vellum and stamp a sentiment onto it in black ink, add this to the card.
With my pre stamped poinsettia sheet, cut out and ink up with distress ink ( barn door ) stamp with a script stamp then use gems for the centres.
Make the ribbon leaves by cutting a small length of ribbon, fold over and pleat the edge then with fine wire wrap around it to make it secure on the end make six all together.
Arrange the poinsettia's, ribbon leave's on the card. Use pinflare glue to give the flowers lots of depth and diminish.
To finish it off add two flourishes and a die-cut gold lantern.
Hope you like!
Thanks for stopping by and Happing Crafting to you all.
Love Sharon XXX :-)


Wednesday, 9 December 2015

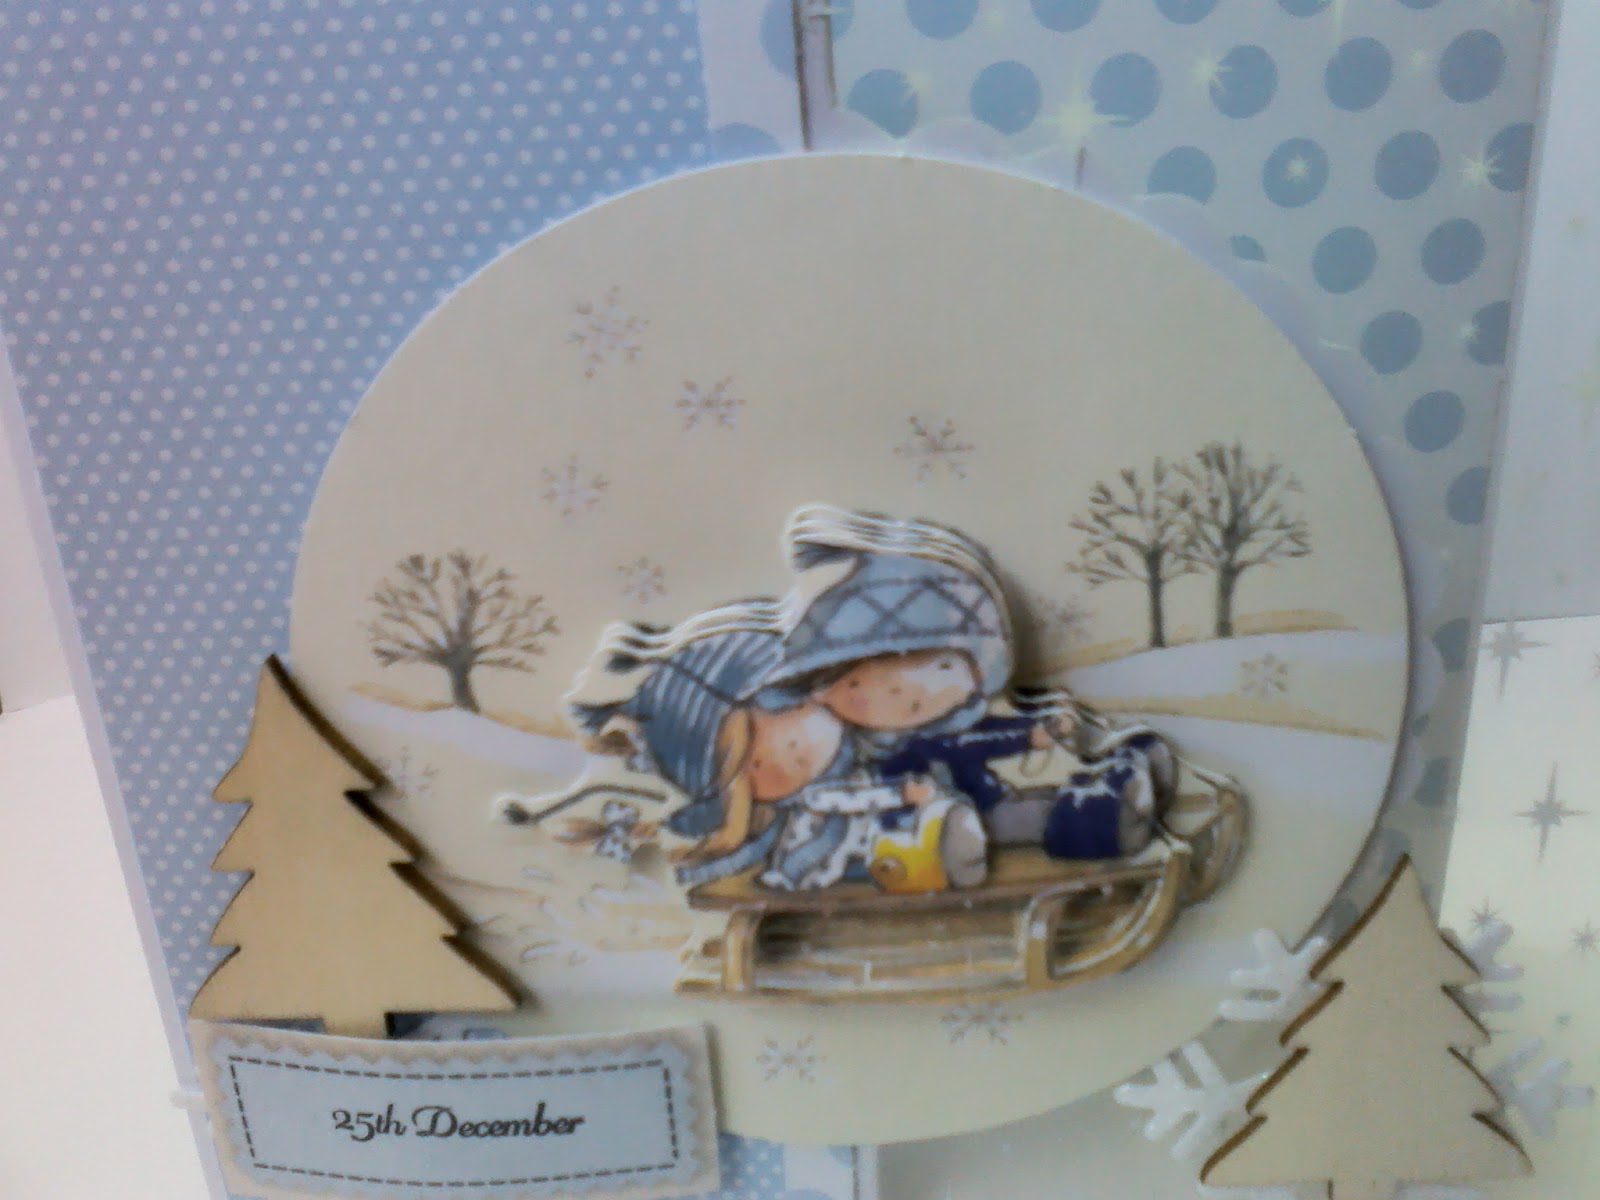
Sledge ride.

Hi everyone. Just stopped by to share my latest card with all my fellow crafter's out there. It's a card idea made with acetate my fav craft material at the minute. It's so versatile you can use it in so many different ways on your projects and they come in some lovely patterns too.

This is how I made the card.. Tilly daydream and friend.
Start with a swing card ( I had some in a pack I had forgotten about the round topper fitted perfectly on the circle ) Next take two pieces of coordinating paper and cover the front half section and the back section of the card ( I used docrafts capsule collection- spots & stripes ) then with a piece of patterned acetate adhere this to the other half of the front  ( in front of the half circle )Cut a strip of paper to cover up the join, where the paper and acetate both meet. Built the decoupage up onto the topper     ( docrafts Tilly daydream A4 die-cut decoupage ) adhere to the scallop circle on the front of the card and then begain to decorate with wooden trees, snowflakes and a sentiment.
I Hope this idea as inspired you to get out your crafty stash and use whatever you have to hand. All my Christmas cards this year have been made from left over card kits etc from last year, so I haven't had to spend a great deal this year on materials, which is always a plus point.
Thanks for stopping by and Happy Crafting!!
Love Sharon XXX :-)